Installing Sitecore
Once you become a certified Sitecore developer, you will be able to download the latest version of Sitecore and all associated modules from http://dev.sitecore.net/. On dev.sitecore.net, there are always two different formats available for download - the complete site root or an executable file. The following is a list of ways that you can install Sitecore.
Executable File
Download the .exe from http://dev.sitecore.net/ and double-click to start. This .exe will do everything for you - attach databases, modify host file, and set folder permissions. The only downside is that it leaves an entry in the registry under [HKEY_LOCAL_MACHINE\SOFTWARE\Sitecore CMS] and makes your instance available under ‘Add/Remove Programs’, which is misleading. Sitecore is just an ASP.NET application, not a Desktop application.
Manual Install
You can choose to install and set up Sitecore manually by downloading the site root zip. You are responsible for attaching databases and ensuring that permissions are set up properly. You may wish to use this method in environments that require custom installation steps (databases are on another server, custom permissions needed). Follow the installation guide (available on http://dev.sitecore.net/; make sure you are reading the guide for your specific version) and - if you are installing on production - the Security Hardening Guide.
Sitecore Instance Manager (SIM)
SIM is available as a ClickOnce application, and allows you to download and install any version of Sitecore and manage instances of Sitecore on your machine. This is an essential tool for development environments. It also bundles many other handful apps like Log Analyzer, Config Builder and NuGet Generator.
Sitecore Rocks
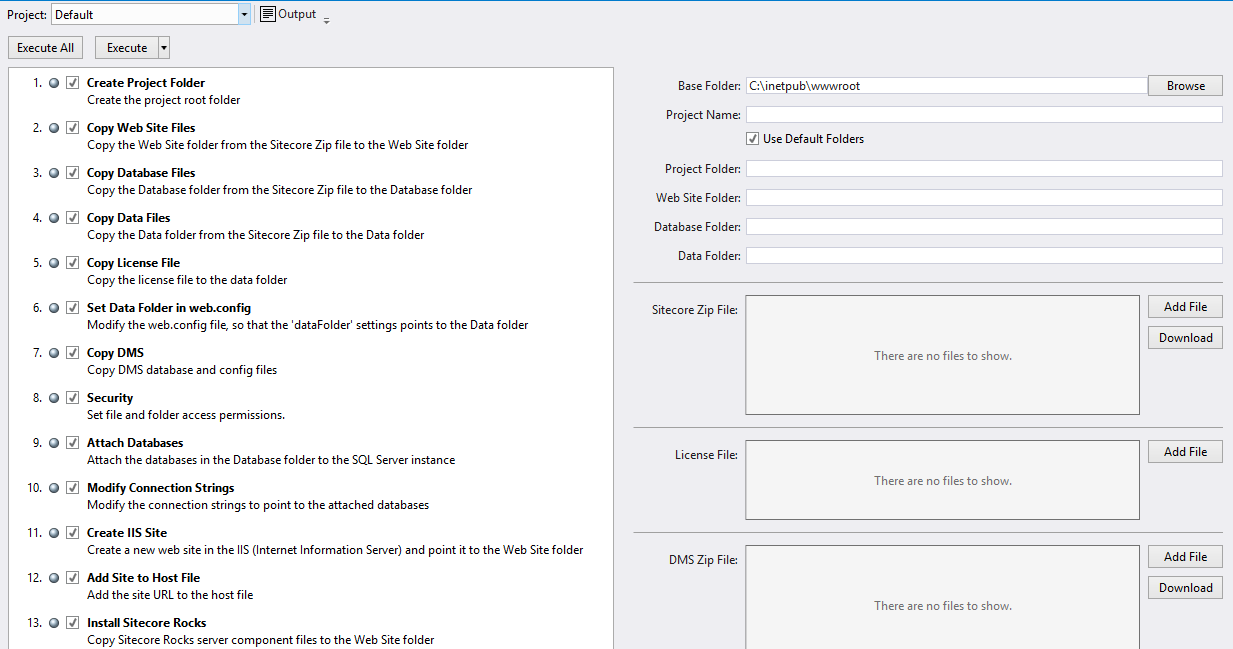
Sitecore Rocks allows you to set up an installation script with any number of custom steps you require for your particular project or development environment. The default scripts are a great example of how to use Powershell to install Sitecore: